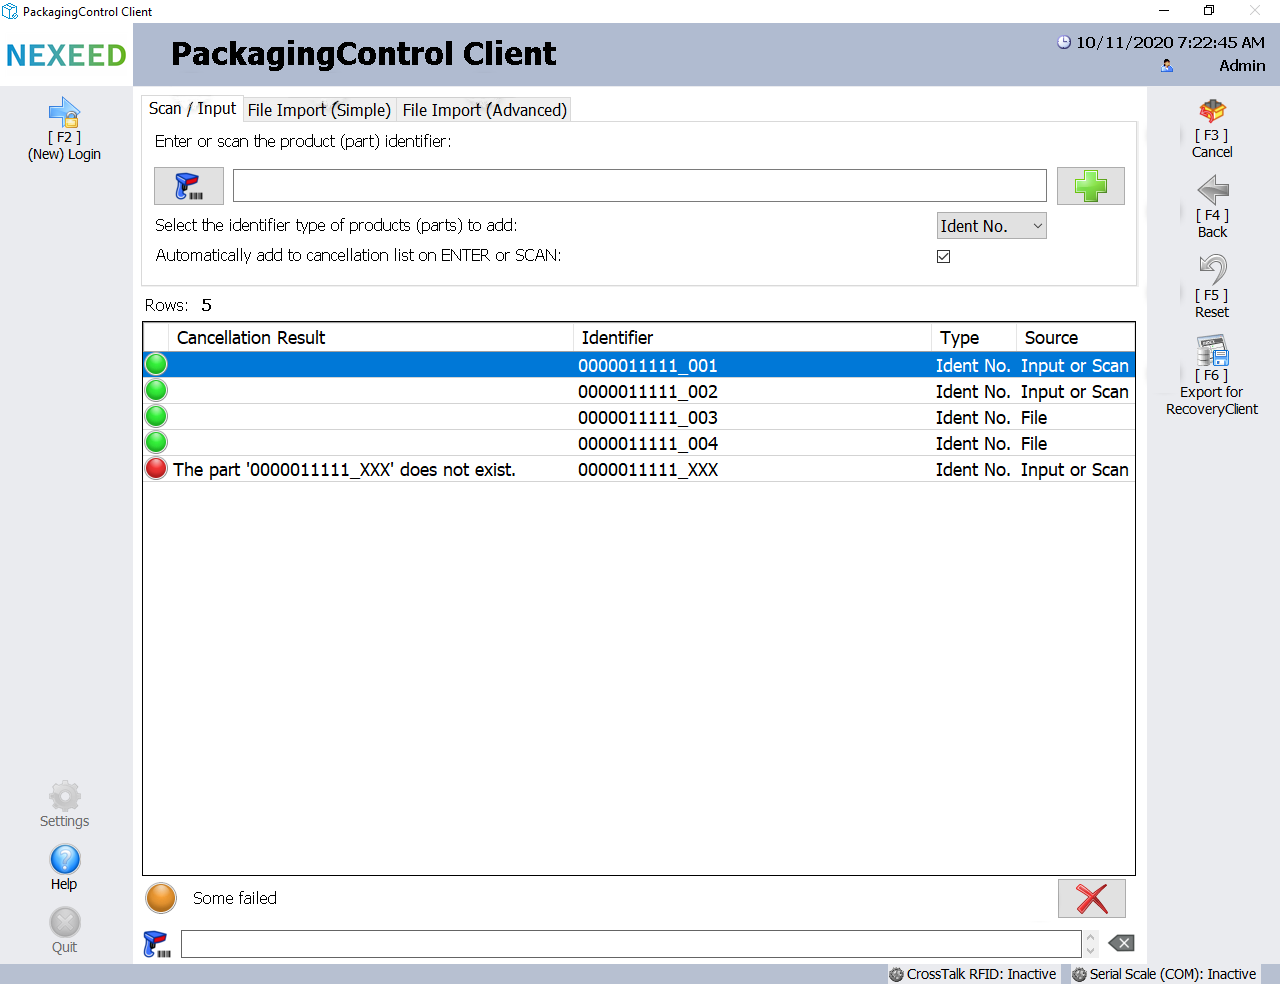
The product cancellation form (window) offers several options for filling a list of products which are later to be canceled. If all the products that are to be canceled are collated, they can be canceled together.
The overall outcome of the cancellation process is displayed at the bottom left. The following variants are available:
Element/icon
Description
Outstanding: The individual products have not yet been canceled (initial state).
All successful: All products have been canceled successfully.
Some failed: Some individual products have failed but others have been canceled successfully.
All failed: None of the products have been canceled successfully.
The individual results are also illustrated by means of similar icons. In the event of an error, a column with a description of the error is also displayed next to the product identifier. The relevant products (parts) can be repacked after cancellation. The form supports the following main options:
Element/icon
Description
Scan/Enter
Add individual products (parts) by scanning or entering them directly.
File Import (Simple)
Add a list of products (parts) from a text file (*.txt).
File Import (Advanced)
Add a list of products (parts) from a delimited file (*.csv).
Delete one or more products from the list.
[F3] Cancel
Performs the cancellation (unpacks) for all listed products.
[F4] Back
Exits the form and returns to the cancellation wizard.
[F5] Reset
Resets the form to the initial state.
[F6] Export for RecoveryClient
Exports canceled products (parts) for import into RecoveryClient.
The user can add products to the list in three different ways:
Adding Products by Scanning/Direct Entry
This option is preselected when the form is opened. The following options are available:
Element/icon
Description
Calls up the scanning form.
After scanning, the identifier is either displayed in the text box or added directly to the list, depending on the option that was checked.
The specified or scanned product is added to the list.
Adding Products by Importing a Text File
Several products can be added to the list using this option. The text file must contain one product identifier per line.
Element/icon
Description
Browse
Opens a dialog to select the path of the relevant text file. The *.txt extension is not mandatory.
The specified file is read and the product identifiers that it contains are added to the list.
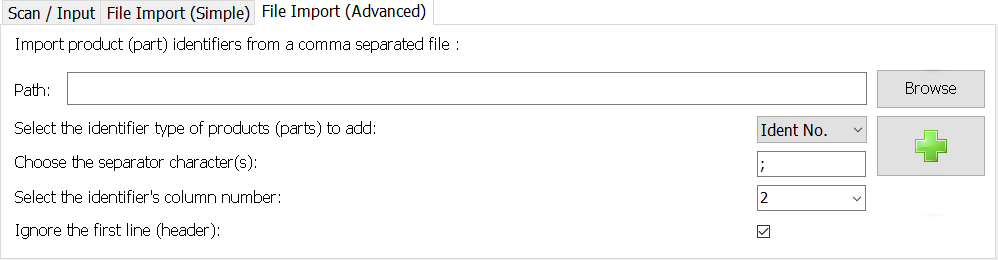
Adding Products by Importing a Comma-Separated File
This input method offers additional options so that comma-separated files with different structures can also be imported. One or more separators can be defined or the number of the column containing the product identifiers (starting from one) can be specified. If the first column in the file consists of headers and no useful data, it can be ignored when the file is imported.
Element/icon
Description
Browse
Opens a dialog to select the path of the relevant text file. The *.csv extension is not mandatory.
The specified file is read and the product identifiers that it contains are added to the list.
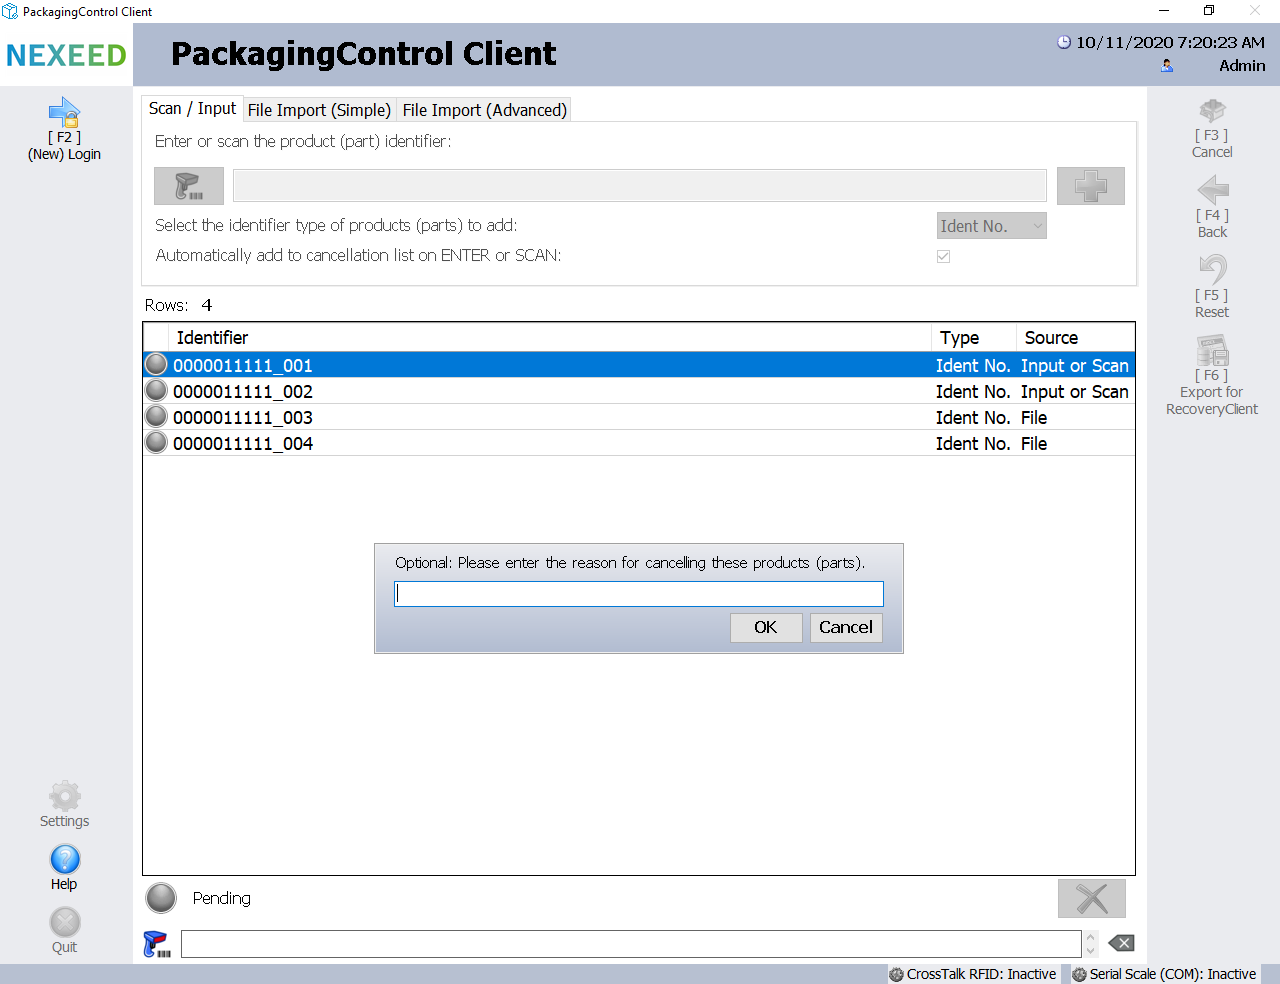
Inputting the Reason for Cancellation
Before individual parts are canceled, the user is asked to provide a reason for the cancellation. Once the reason has been entered, the cancellation process can be completed by pressing the ENTER key or clicking the OK button. Entering a reason is optional.