 .
.
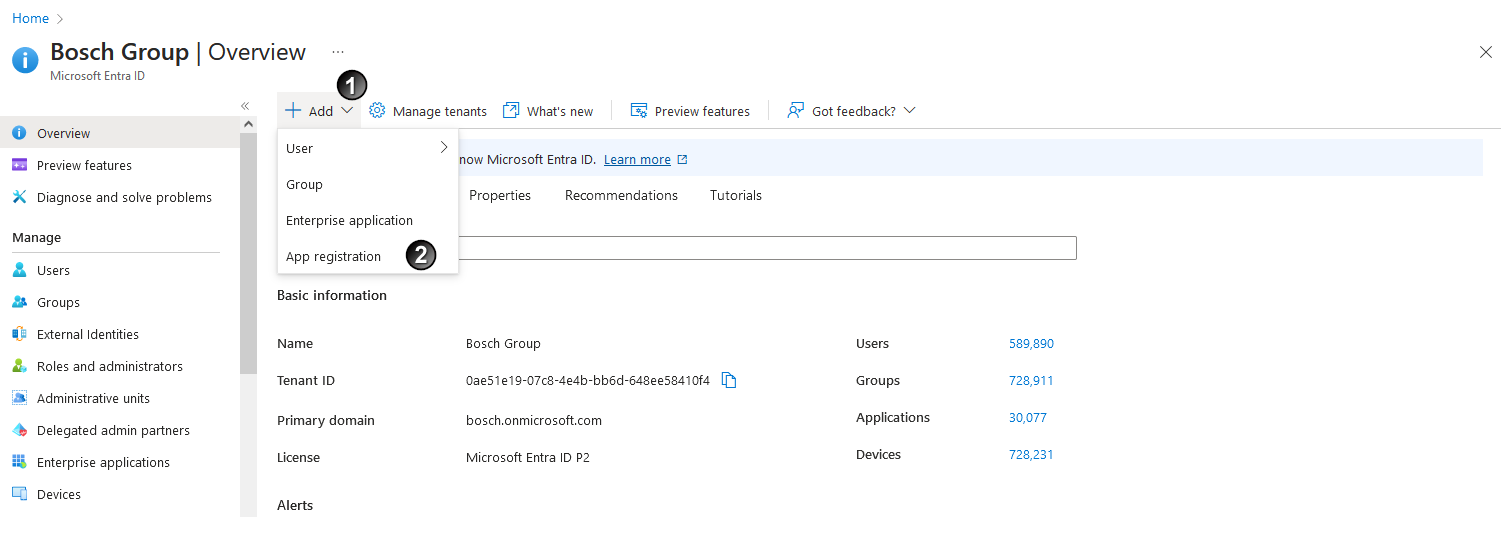
The Azure Active Directory overview is displayed.
 , click on App Registration
  .
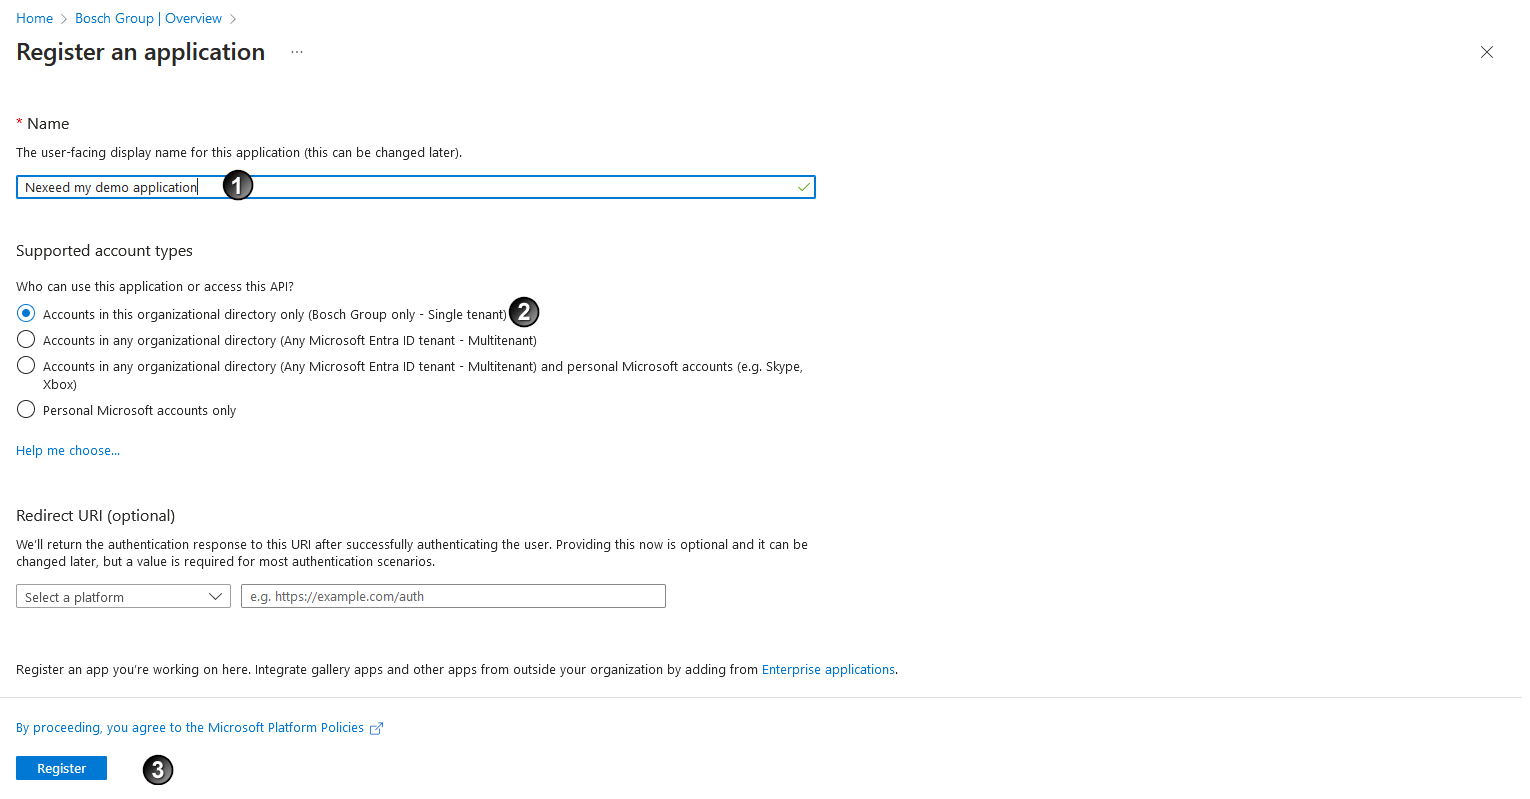
.A new application is created and opened.
 and select Supported account types
  .
. 
 area, click + New secret client
  .
.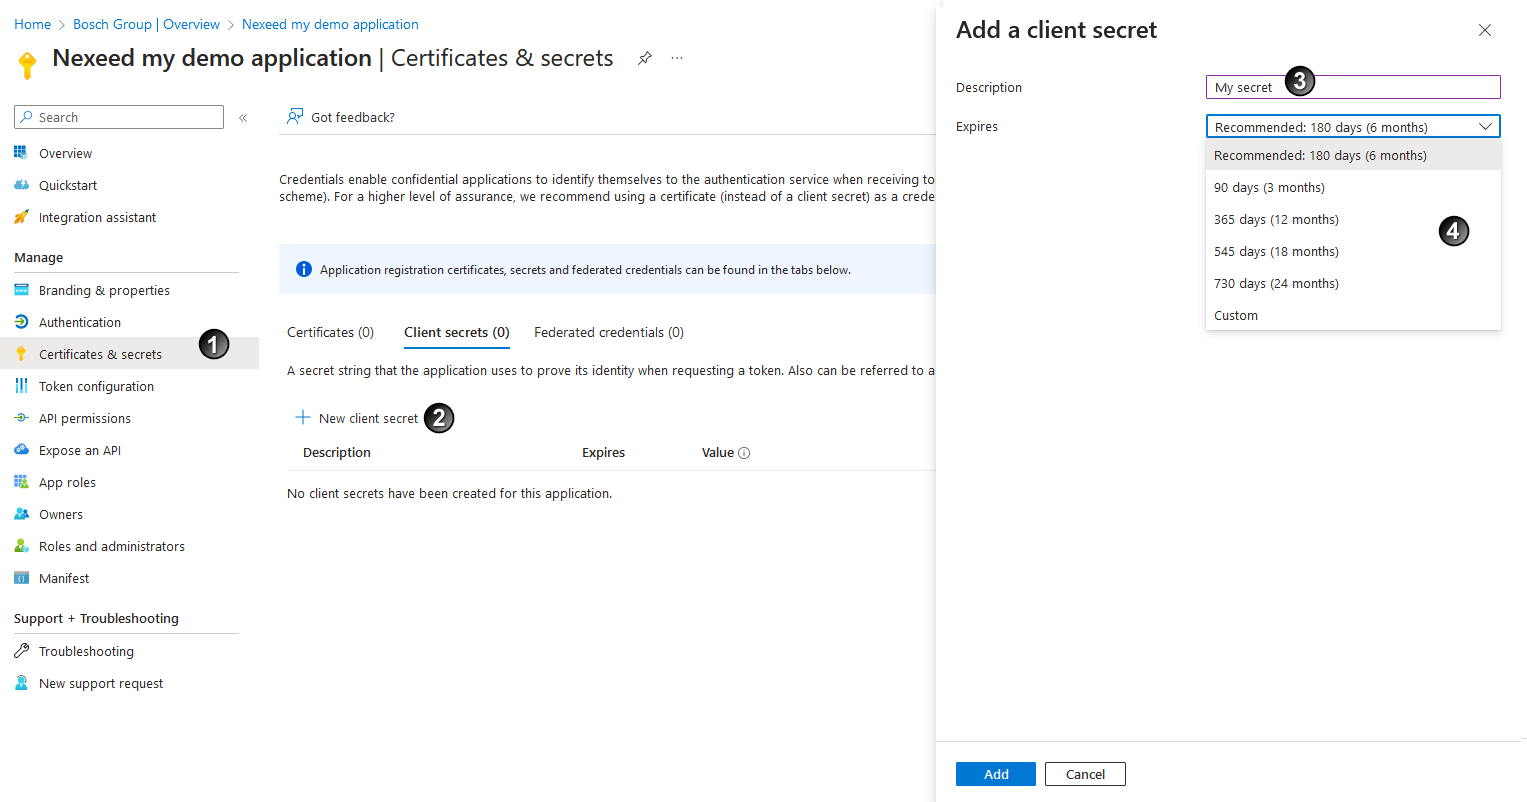
 and period of validity
  .
. .
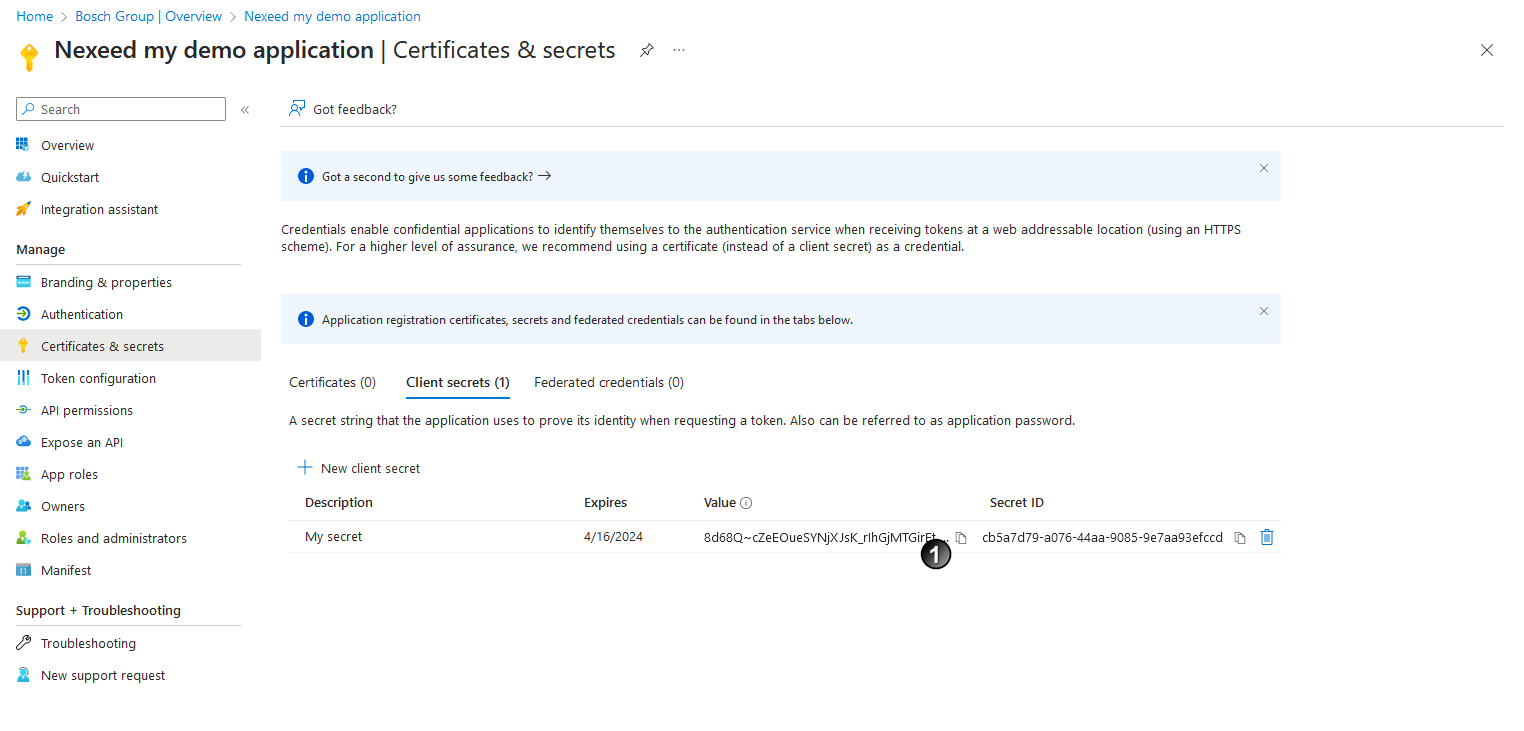
. of the client secret key and save it locally on the computer.
 The client secret key can only be copied once at this time. Subsequent copying is no longer possible.
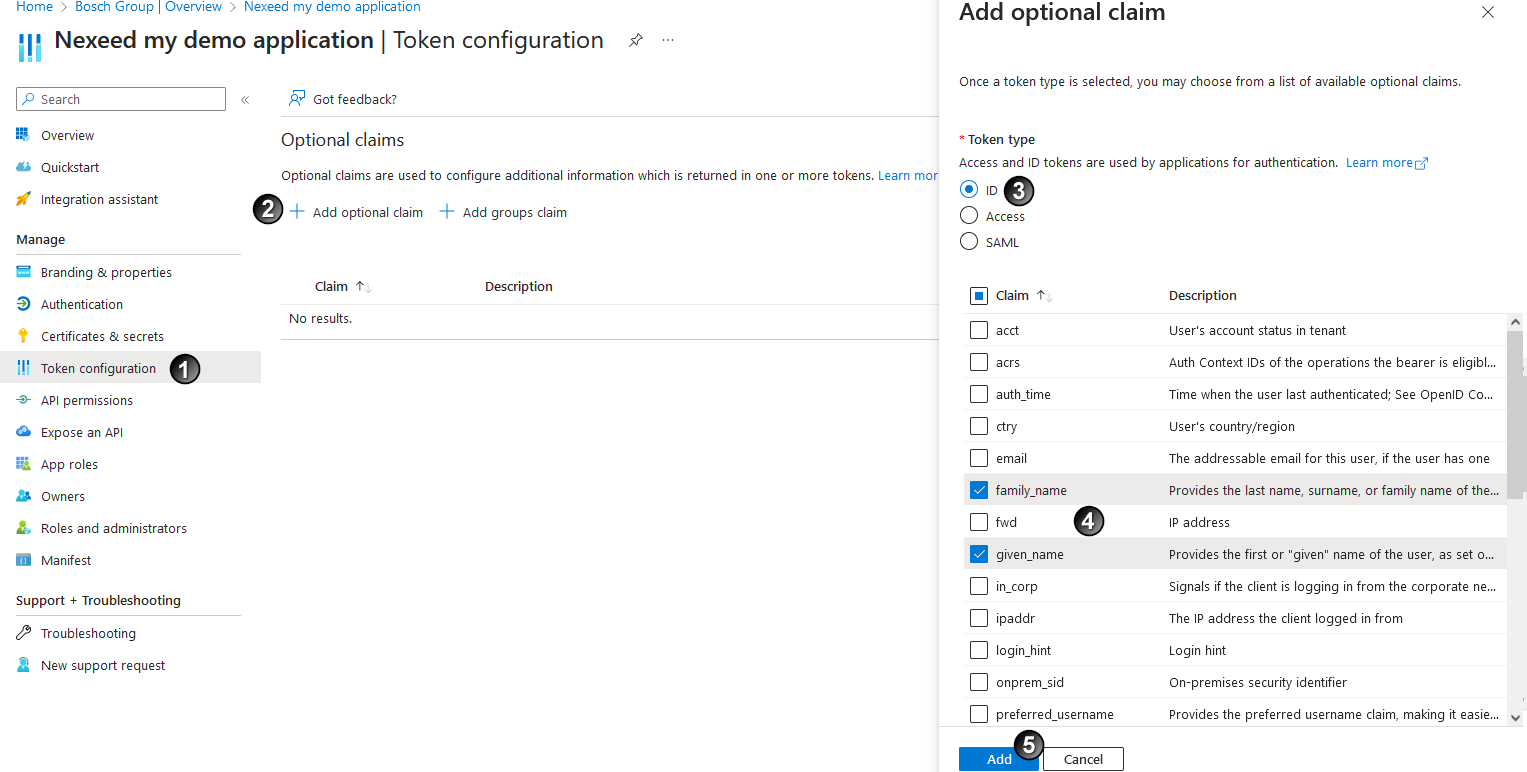
 area, click on + Add Optional Claim
  .
.
 .
. .
. .
.OpenID Connect is configured by default with Nexeed Multitenant Access Control.
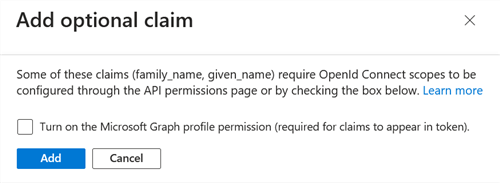
 area.
area.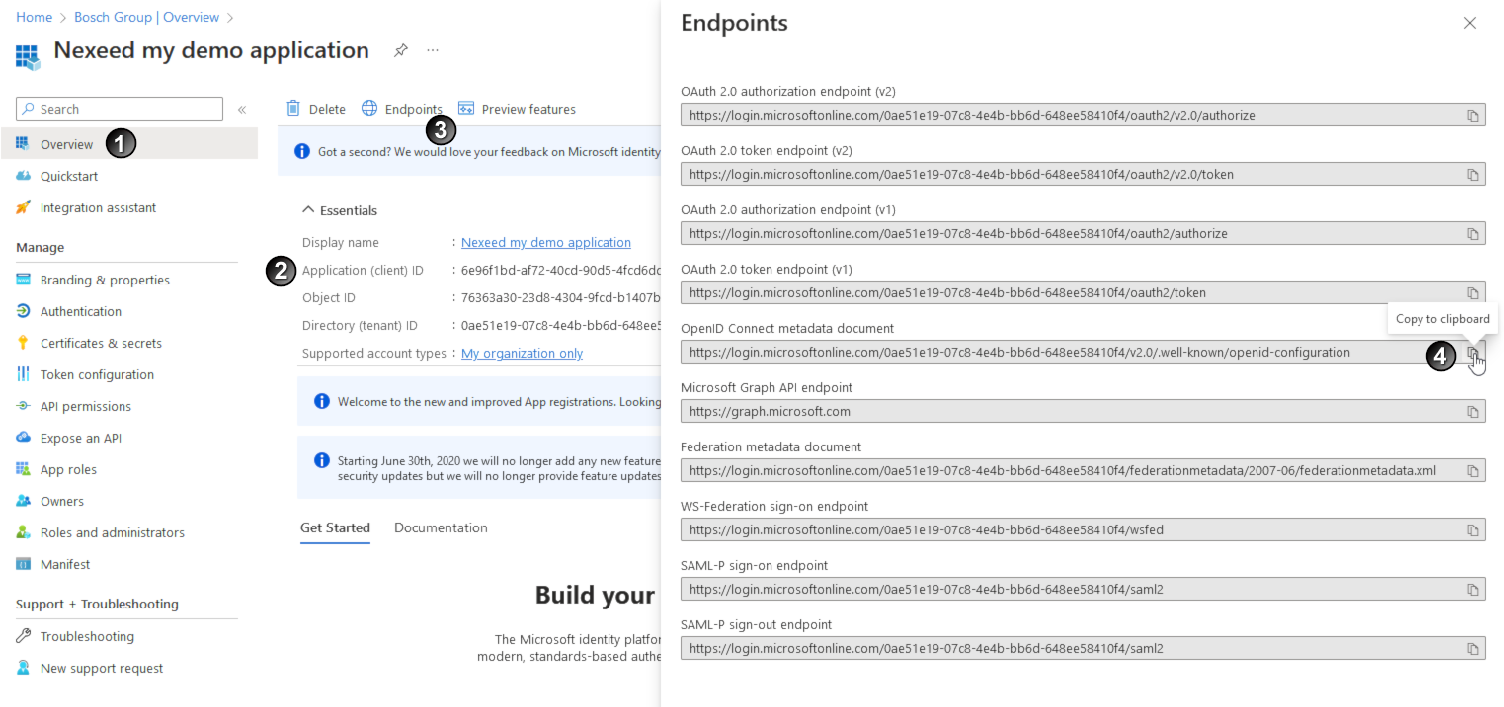
 and save it locally on the computer.
  tab.
tab. and save it locally on the computer.


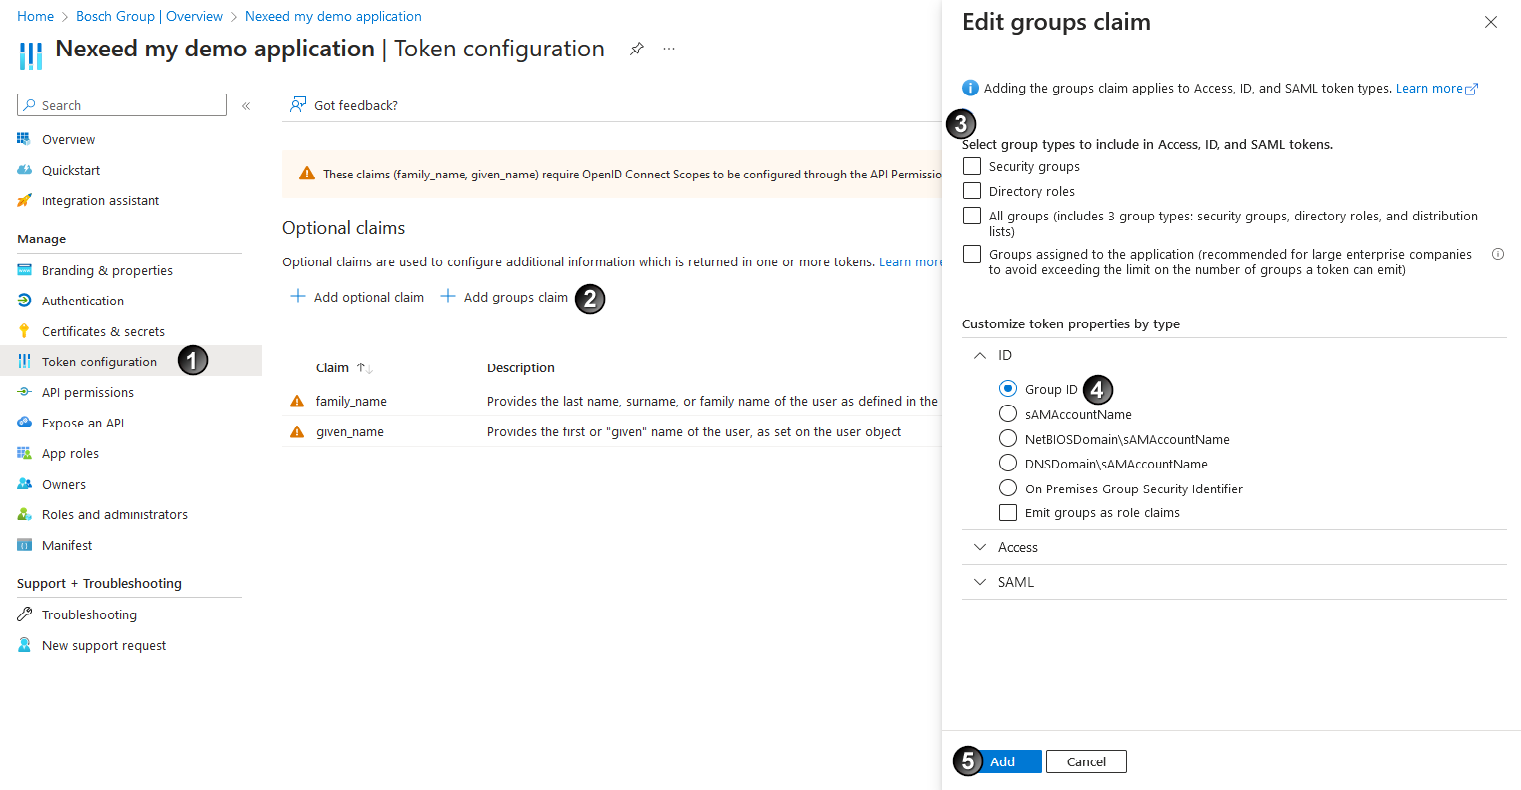
 + Add group claim
  .
.
 .
.Select groups/roles that should be part of the tokens issued during login.
The selection of Groups assigned to the application assumes that relevant groups are explicitly assigned to the application and the consequence of this is that the group hierarchy cannot be used.
If the application is not subsequently given the necessary permissions for Microsoft Graph, do not add all existing groups to a token. Otherwise, once 200 or more groups are assigned to the user, they will not all be available.
Do not add all existing groups to a token without configuring the login_hint claim. A large token with more than 10 kB can otherwise lead to problems during logout.
 (example: Group ID).
You can send either the Group ID or SAML in a token. The extended entitlement to group assignment must be used accordingly.
 .
. in the API permissions
  area and then select the Microsoft Graph
  API under Microsoft APIs.
 User.Read and GroupMember.ReadAll and click on Add Permissions. It is recommended to grant administrator approval, otherwise a user will have to request this during the login process.
 .
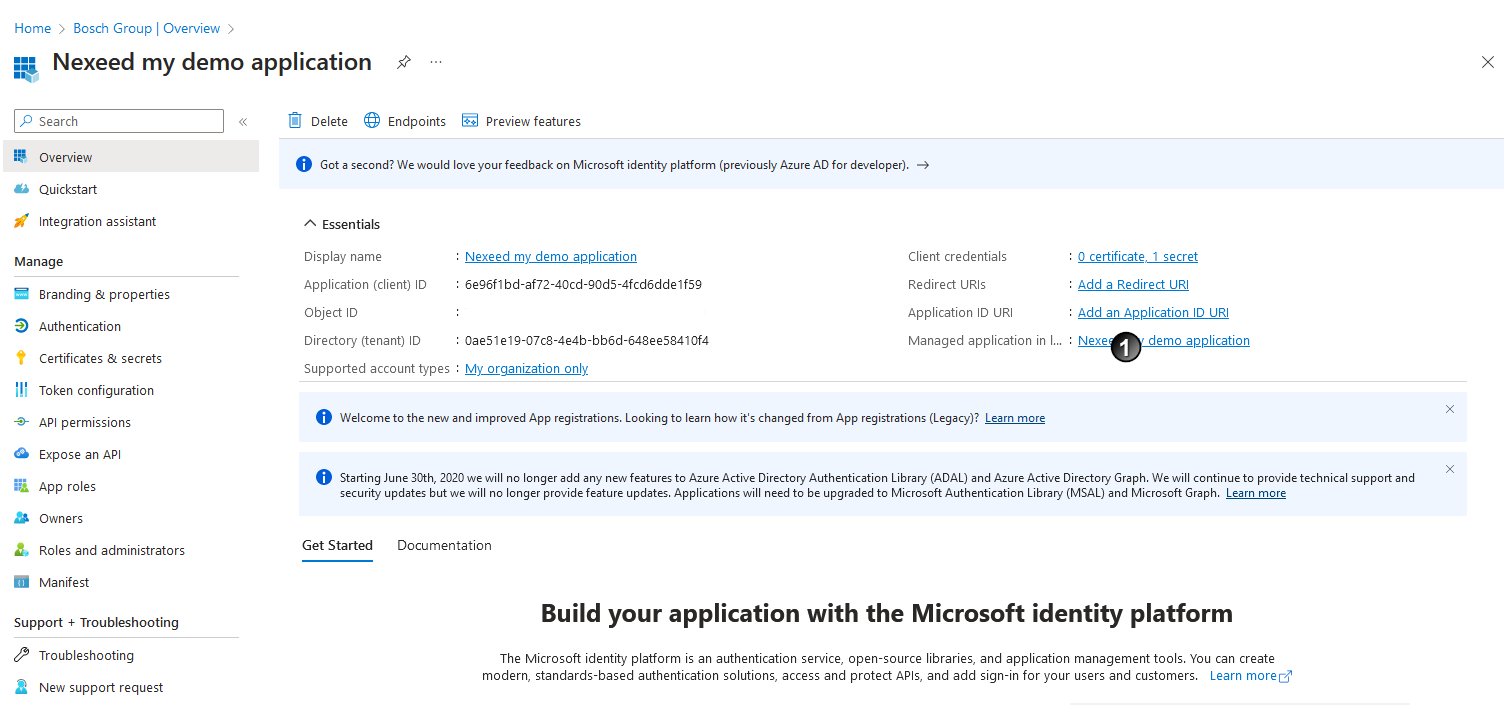
. 
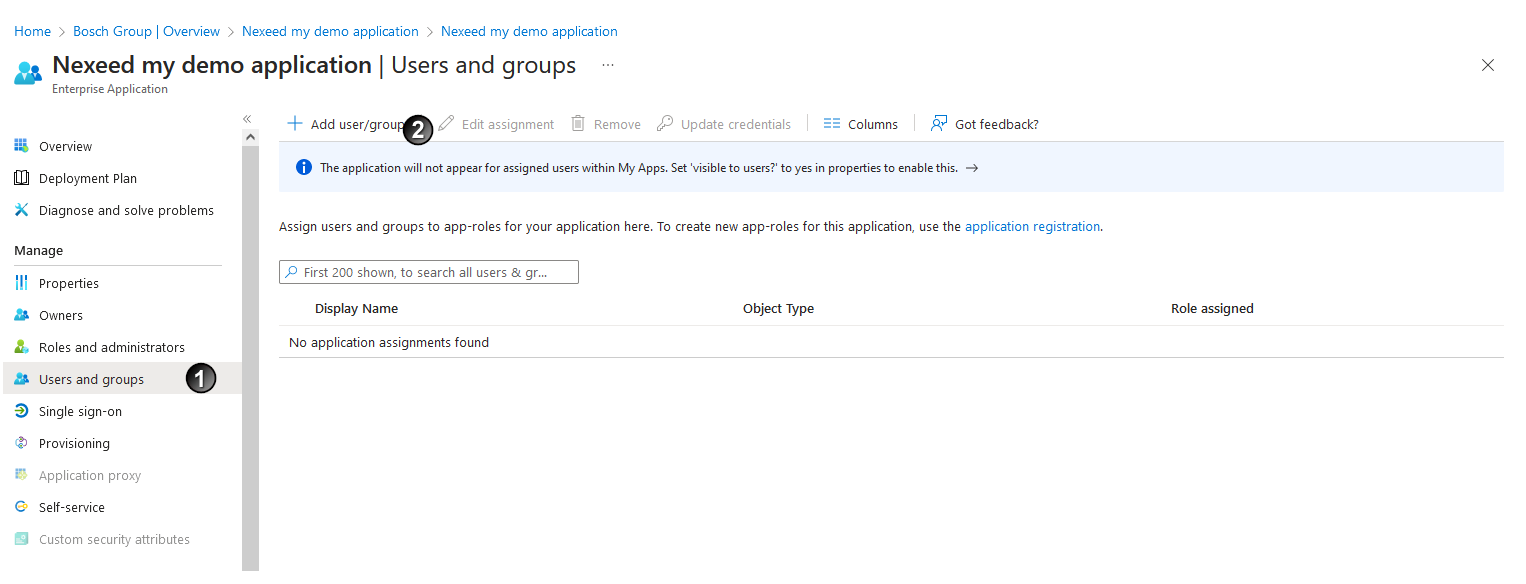
- in the Users and groups
 area, click on + Add user/group
  .
.
- Click on None selected
 .
.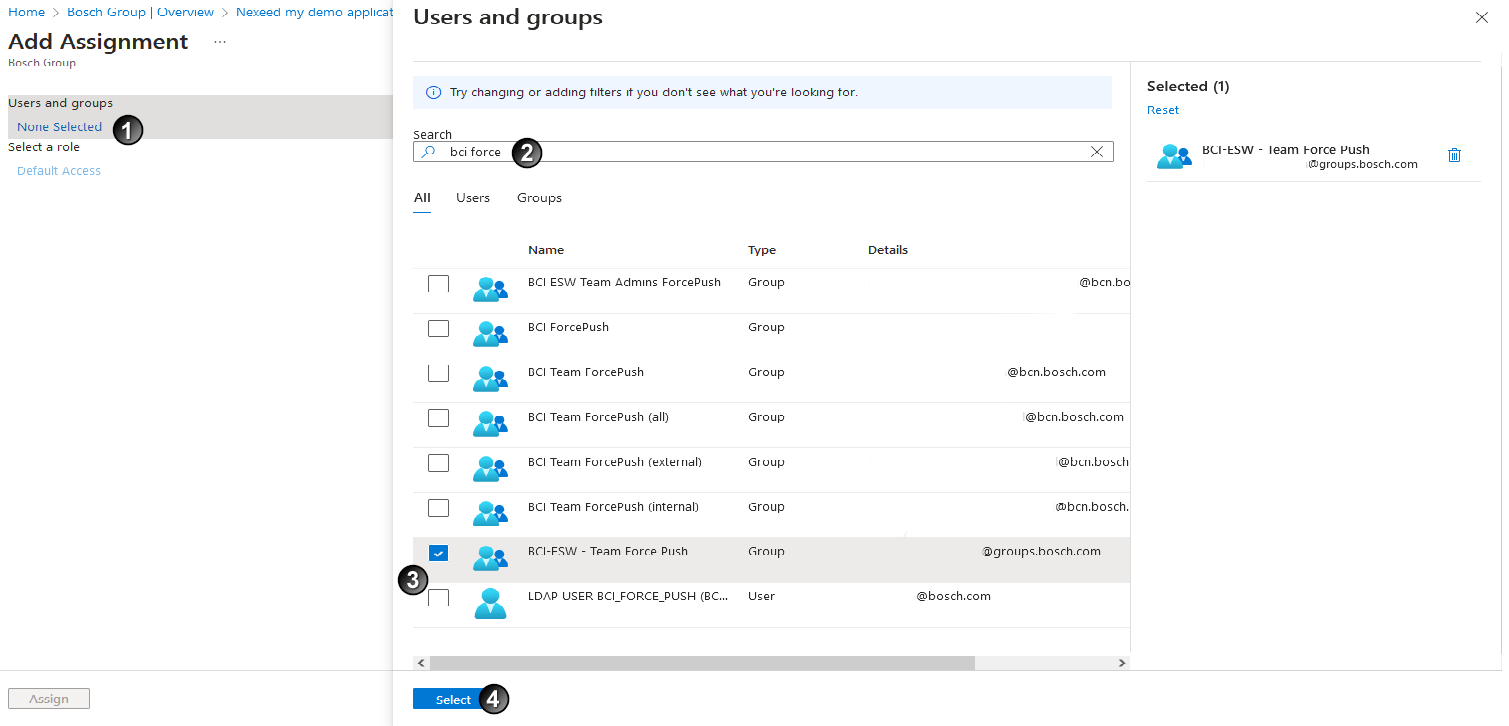
- Search for group names
 and use checkboxes to
  assign the desired groups to the application.
 - Click Select
 .
. - Click Assign
 .
.
The group is assigned to the application.
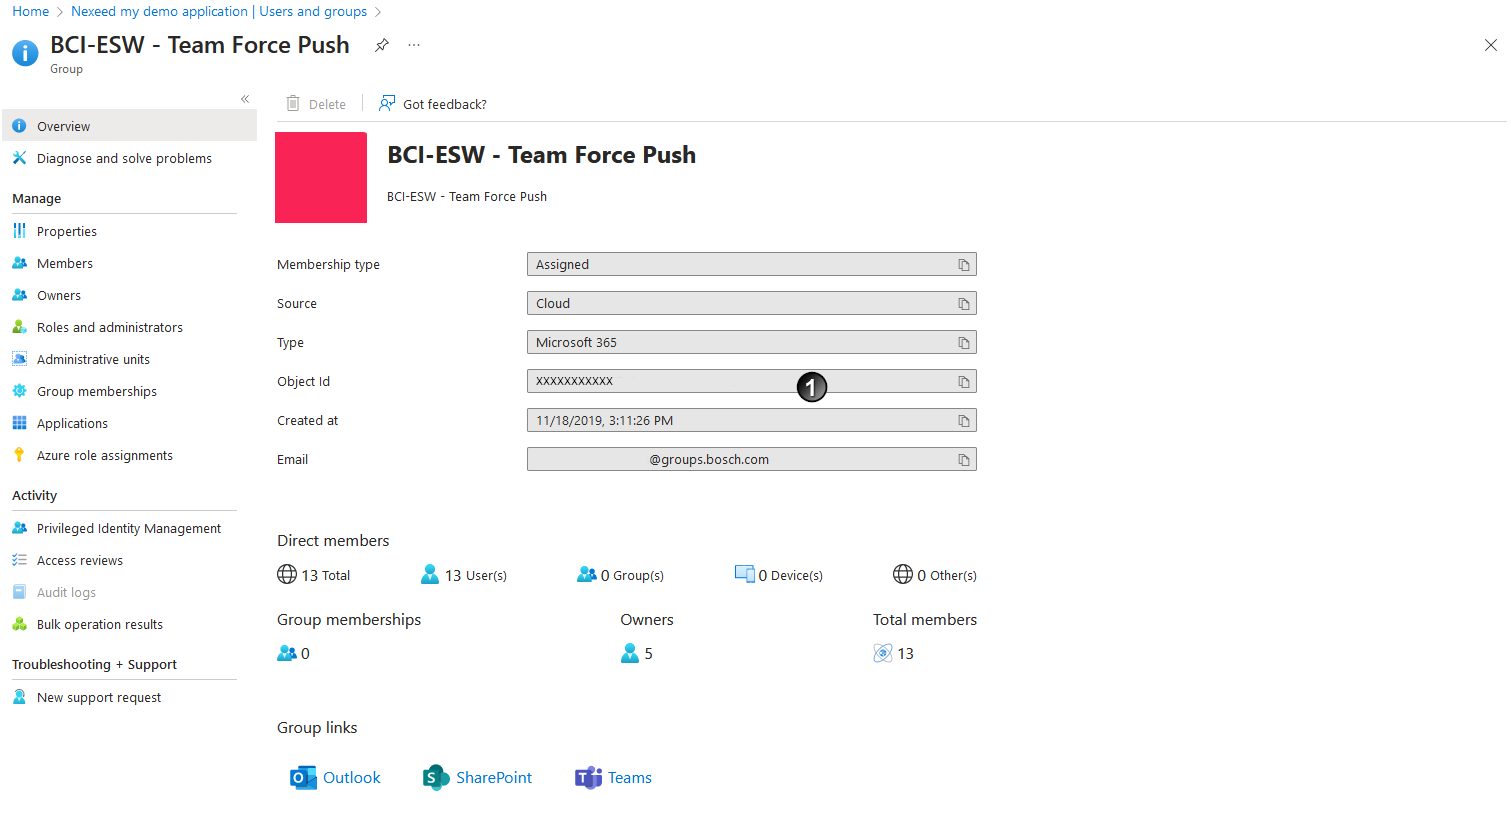
- In the Users and groups area, click the newly assigned group
 .
.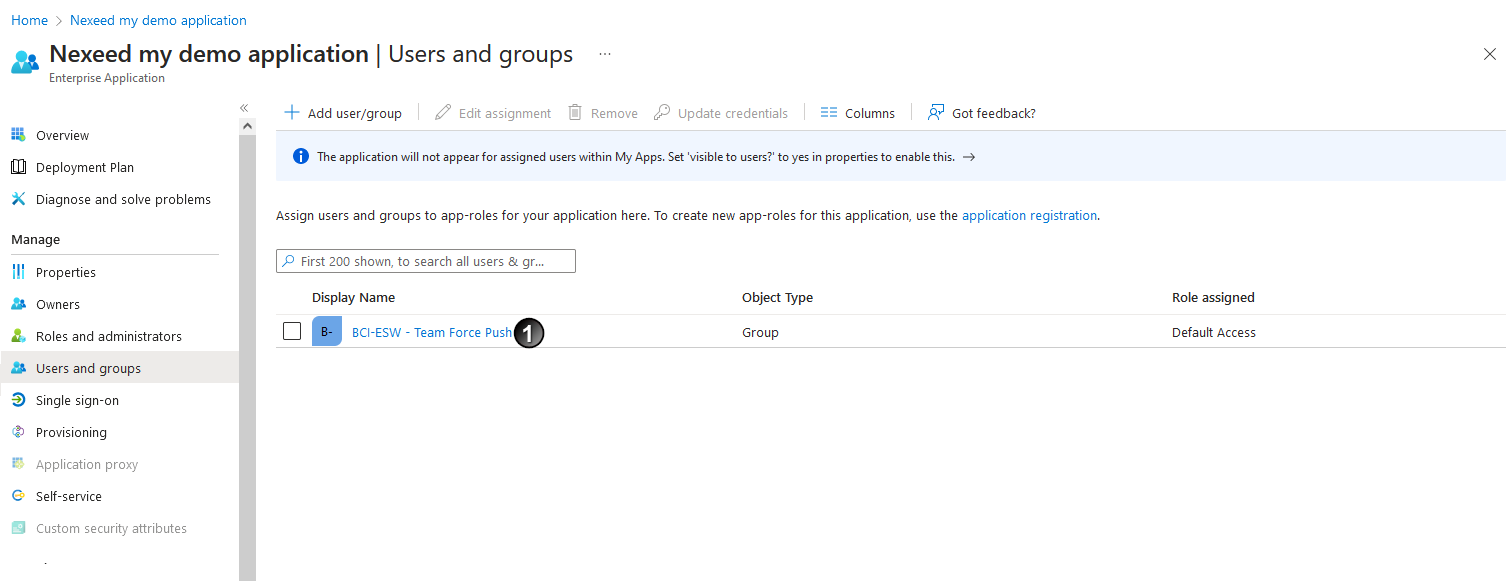 I
I
 to the clipboard (if tokens have been configured with samAccountName, use this instead).
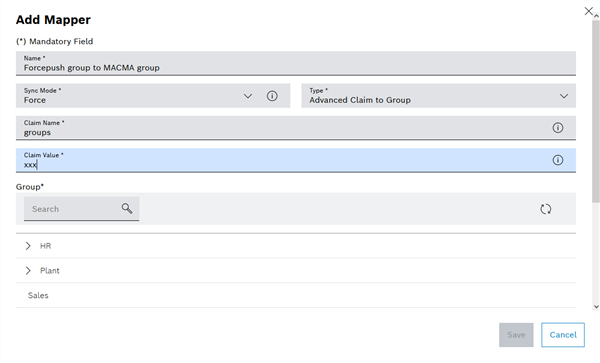
This ensures that the claim is checked each time the token is logged in and the assignment to the mapped group is executed again and updated.